Function introduce :
The DAC can setting the digital
process functions on front plate to change the sound flavors and
control functions, without open the unit .
How to active the
digital setting mode:
While user going to change the
setting function, we advice user shut the volume and stop the music
source playing.
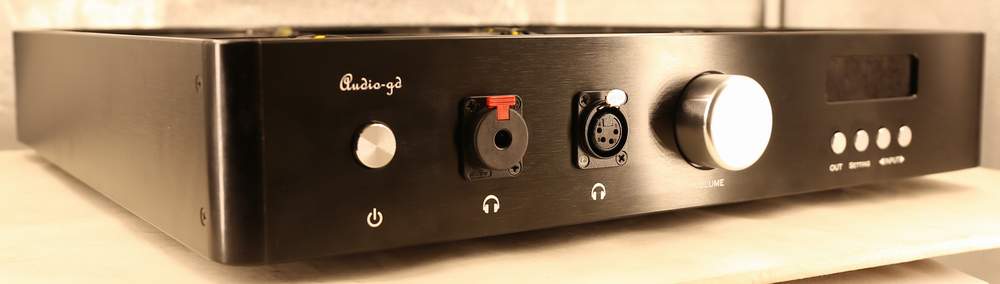
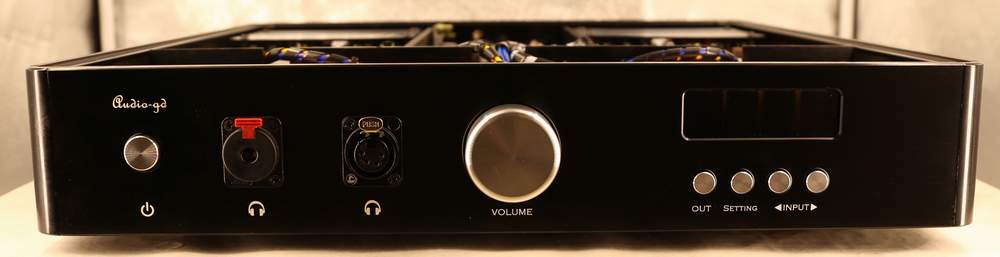
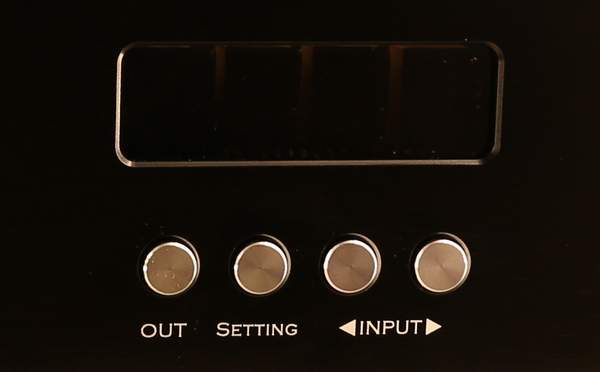
The function of the "Setting" button:
Push the "Setting" button one
times, the one digital of the display will blinking, the blinking
digital mean that can be change the setting.
While the display blinking,
push the "Setting" button again, the next right one digital will
blinking, it mean that can be change the setting. While the right
first digital blinking and push the "Setting" button again, the
display will go into the 2nd setting menu .
The function of the "Left INPUT" button:
While the display blinking,
push the "Left INPUT" button, the next left one digital will
blinking, it mean that can be change the setting.
The function of the "Right INPUT" button:
While the display blinking,
push the "Right INPUT" button, the blinking digital will change the
state, it mean that setting had changed.
In the setting mode, 5 second
later without any button push, the display stop blink and back to
the normal display mode. User can start play the music and turn the
volume up.
The below diagram show the two
page menus and the functions:
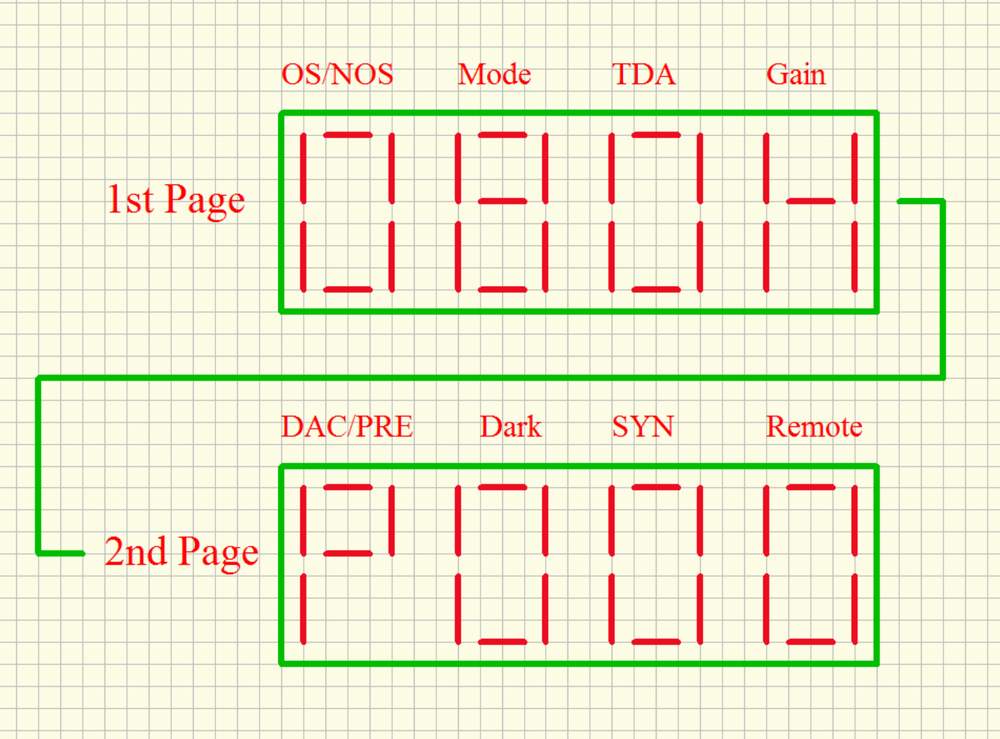
1st page
setting menu
1st display : OS/ NOS
"O" for select oversampling,
"N" for select NOS mode.
2nd display : Mode of OS/ NOS
While OS
setting on "O" mean the DAC working under oversampling
mode, lower number OS modes sound became warmer
and smoother. Or depend on your sense .
Mode "0" : class
technology NOS mode.
Mode "2" : 2X oversampling.
Mode "4" : 4X oversampling .
Mode "8" : 8X oversampling.
While OS setting on "N" mean
the DAC working under NOS mode, it has one mode now, it is the full
new NOS configure design.
3rd display :
TDA (Simulate
SAA7220 +TDA1541A sound) :
Active
(1) : Simulate TDA1541A sounding, While active this
function, and set toOS0 or OS2 or OS4 mode, simulate
SAA7220+TDA1541A sounding . In fact, this
function can working with any setting mode and bring the different
sound flavor.
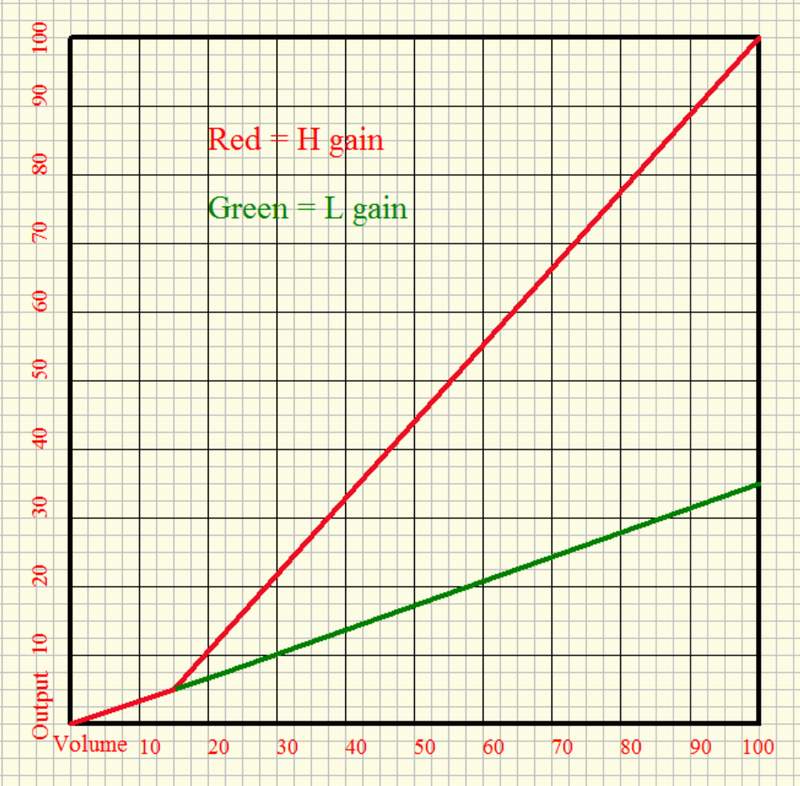
4th display :
Gain
H mean
High gain, and L mean Low gain. The Low gain is 12DB, match with the
headphone with over 95DB sensitivity . High gain is 22DB, match with
the headphone with less than 95DB sensitivity, even the HE6 , it can
be drive fully .
2nd page
setting menu
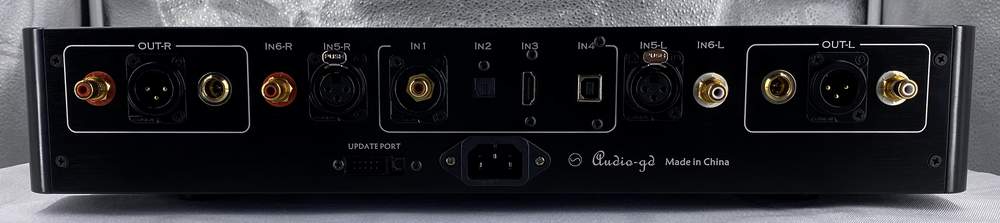
1st display :
DAC/PRE (Select the rear output state)
"d" mean the XLR/RCA/ACSS outputs on rear set to DAC mode, in case
the volume control had disable. (The headphone output always has
volume control ).
'P" mean the XLR/RCA/ACSS
outputs on rear set to preamp mode, the volume control available.
2nd display : Dark
Active (1) the display
auto dark, the display will become dark in around 10 seconds after
stop operate any buttons . Disable (0) the display auto dark, the display light
always.
3rd display : Reserved
4th display :
Remote
This is mean the remote
function setting, if it set to 0, whether long or short push the
remote controller volume button, the unit volume only change 1 step
. If set to 1, push and hold the remote controller volume button,
the unit volume change continuously .In case if set to 1 but the
unit had control by other devices , set to 0 please.
Setting
examples:
1,Set to most neutral sound mode
(8x oversampling, non TDA mode):
Push the "SETTING" button one times, the 1st digital
of the 1st menu blinking, then push the "Right INPUT" set it to
"0" , then push the "SETTING" button one times, ,the 2nd digital
blinking, push the "Right INPUT" set it to "8", then push the
"SETTING" button one times, ,the 3rd digital blinking, push the "Right
INPUT" set it to "0" .
2,Set to TDA1541
Simulate mode:
Push the "SETTING" button one times, the 1st digital
of the 1st menu blinking, then push the "Right INPUT" set it to
"0" , then push the "SETTING" button one times, the 2nd digital
blinking, push the "Right INPUT" set it to "0" or "2" or "4" (the number
lower sound is more warmer and smoother), then push the "SETTING"
button one times, ,the 3rd digital blinking, push the "Right INPUT" set
it to "1" .
3,Set to NOS mode (New
configure NOS mode with simulate TDA mode for the one of the most warm
and smooth sounding):
Push the "SETTING" button one times, the 1st digital
of the 1st menu blinking, then push the "Right INPUT" set it to
"N" , then push the "SETTING" button two times ,the 3rd digital
blinking, push the "Right INPUT" set it to "1" .
4,Set to High Gain mode:
Push the "SETTING" button one times, the 4th digital
blinking, then push the "Right INPUT" button set to "H" .
5,Set to DAC output mode :
Push the "SETTING" button one times, the 4th digital
blinking, then push the "SETTING" button one times, the 1st digital of
the 2nd menu blinking, push the "Right INPUT" set to "d".
6,Set to remote volume continued
control mode:
Push the "SETTING" button one times, the 1st digital
of the 1st menu blinking, then push the "Left INPUT" button one times,
the 4th digital of the 2nd menu blinking, push the "Right INPUT" button
set to "1".
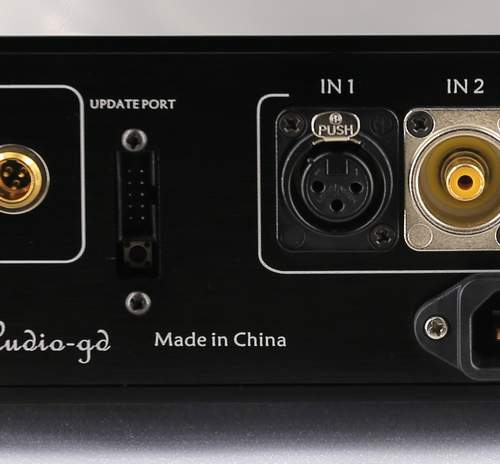
HDMI
definitions :
(Apply HDMI transmit the IIS signal, the pin's definitions must
exact same , and not promise compatible with other brands)
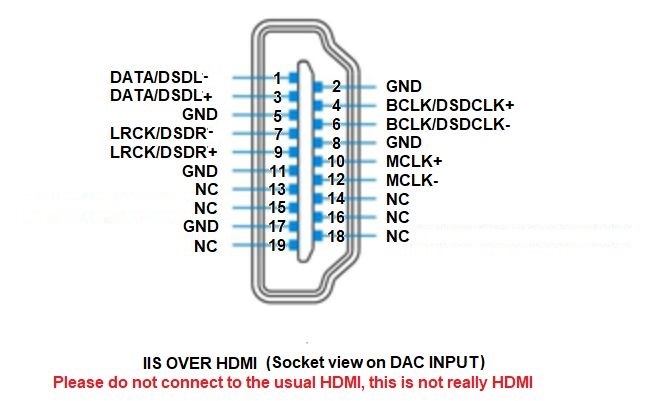
This product don't need the source MCLK signal but even the
source has MLCK output but has not effect . |