|
Update steps:
1, Before update , you had to
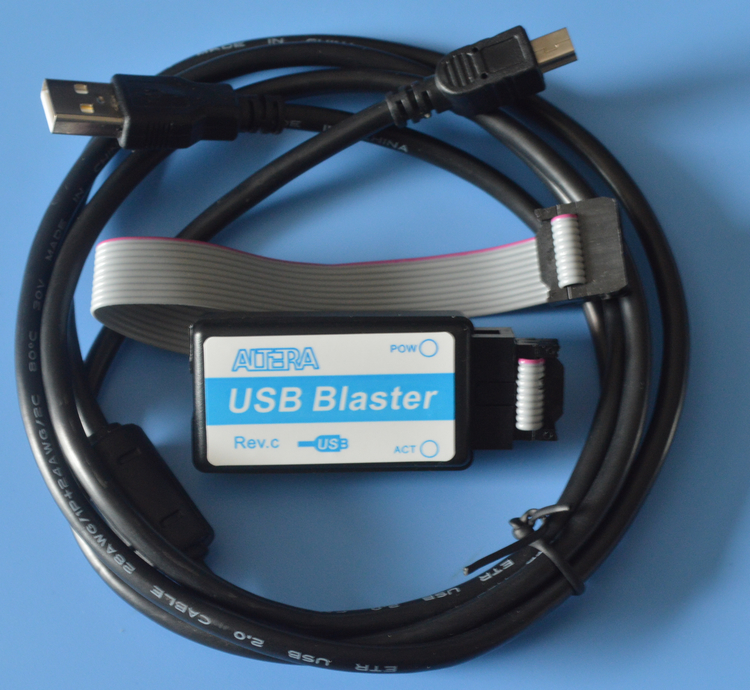
buy an USB Blaster, like this or similar model.
USD10 blaster
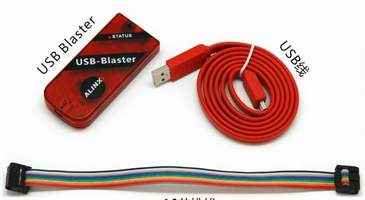
USD3 blaster
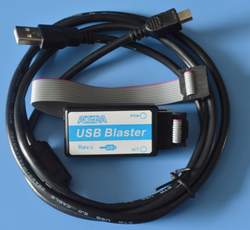
You can search the keyword " Altera USB blaster" on ebay to buy one.
In
Chinese market , price around USD3 to USD10.
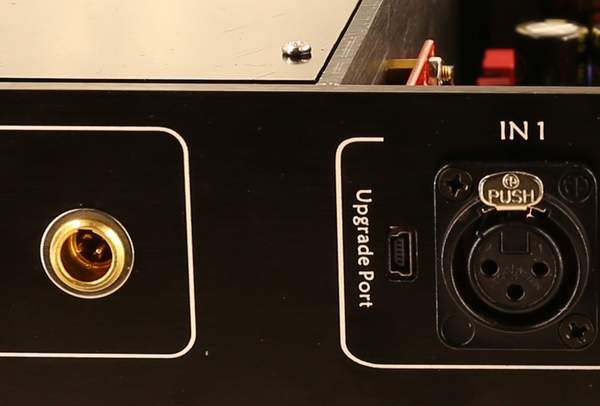
Be note : If your DAC has the
below type Update Port, it already built in the blaster, you don't
want buy the blaster for the update.
2,
Update tool download (Thanks Headfi
member "DACladder" support the download link.)
Altera 16.0 Programming SW. Choose Quartus 64 or 32-bit
installation...
https://onedrive.live.com/?id=636DC4E8060D66A1!321&cid=636DC4E8060D66A1
3, When finished the Quartus II software install,
don't open the Quartus II , connect the USB Blaster,
the Windows request the driver install, select the driver to install
.
If the Windows has not request the driver install, open the
Windows device manager, pull off and push into the blaster , there
will appear an unknown USB hardware, right click it and select the
driver update, browse to below path.
Driver browse path: C \ altera \ 12.1 \ quartus \ drivers
If you can not find the
upon path, download the driver
Blaster driver download :
Driver
4, Power off the DAC,
connect the USB Blaster to the DAC, then connect the USB Blaster to
the computer . ( Be note : if the DAC had power on then connect the
USB Blaster, you may damage the chip of the DAC and want to pay the
charge to replace. )
Some later models with the below Update Port on
rear, the blaster output wires connect to the port correctly.
(Please note, don't touch the button in the Update port when the DAC
power on, it will remove the Amanero USB firmware ) .
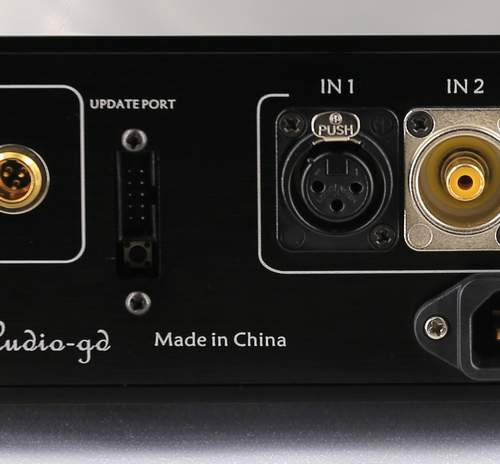
And
some later models with below Update Port on rear, it is built in USB
blaster , user just connect the USB cable between the computer and
the DAC.
If your DAC without the Update Port on rear, you had to open the top
cover , connect the blaster to the Update port inside. See below
connected guide.
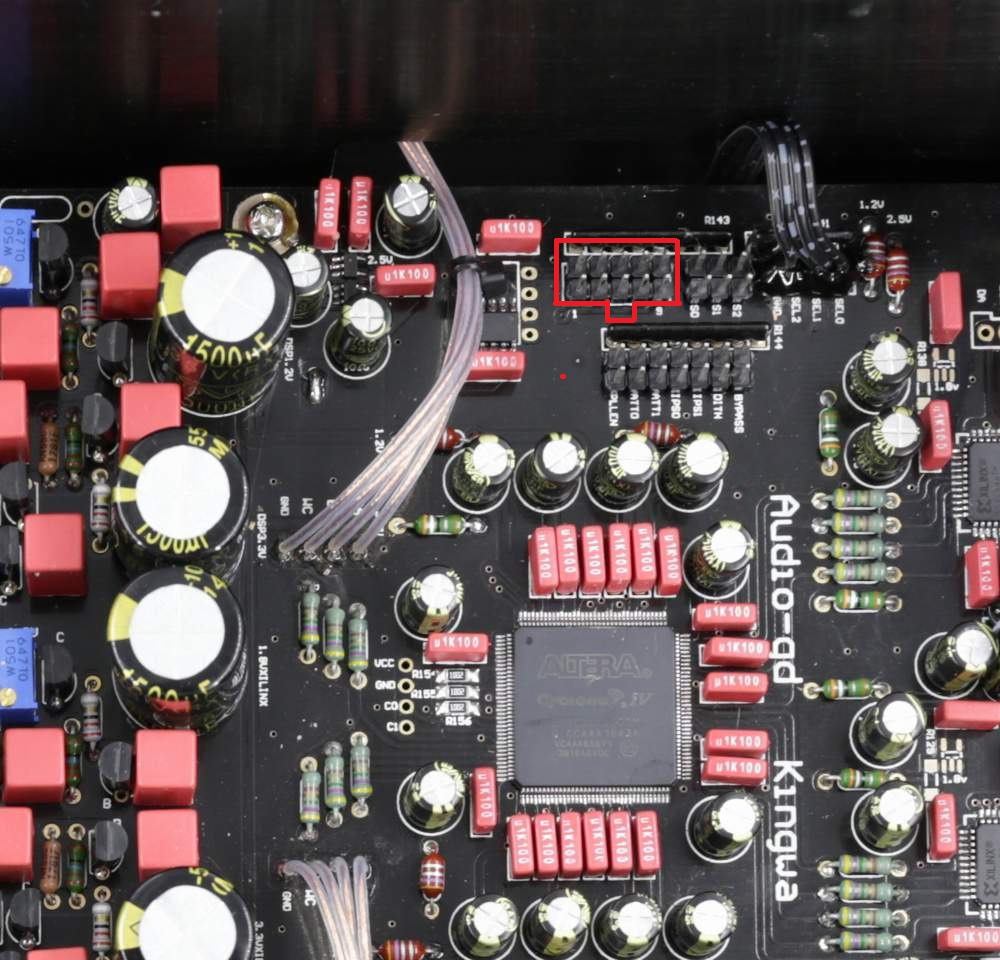
The USB Blaster wires had a outshoot , connect to the unit as below
picture (The outshoot is on the side which is mark 1 and 9 ).
R8 model
(R27 blaster connector has same position but the direction just
invert)

R28 model
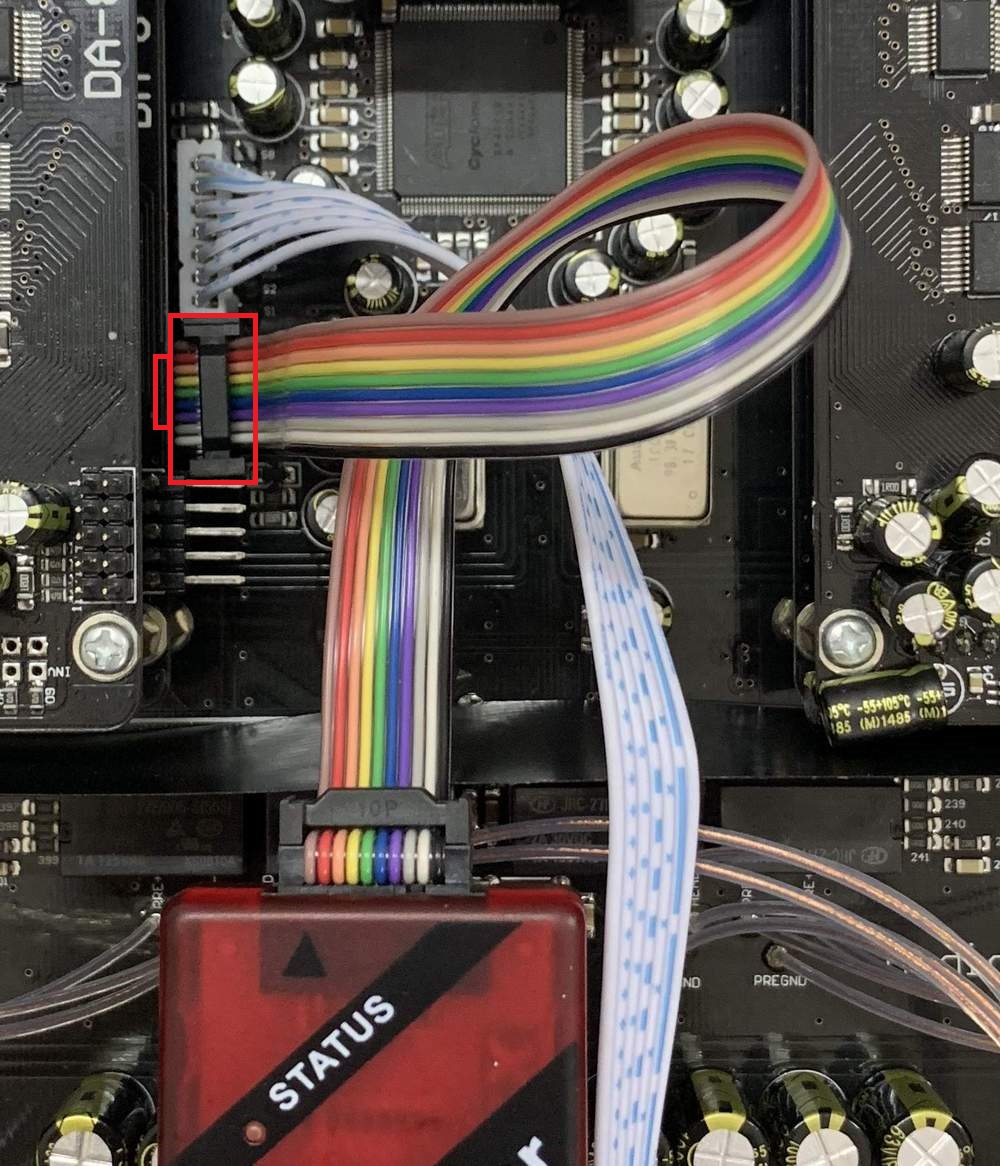
R1 model

Older R2R7, R2R7HE models:
5,Power on the DAC,
open the Quartus software , and select “Perform automatic web license
retrieval “ then click “OK”. During update, you must keep your
computer had the good web connect . If there is no option of
“Perform automatic web license retrieval “, just running the
software as below step.
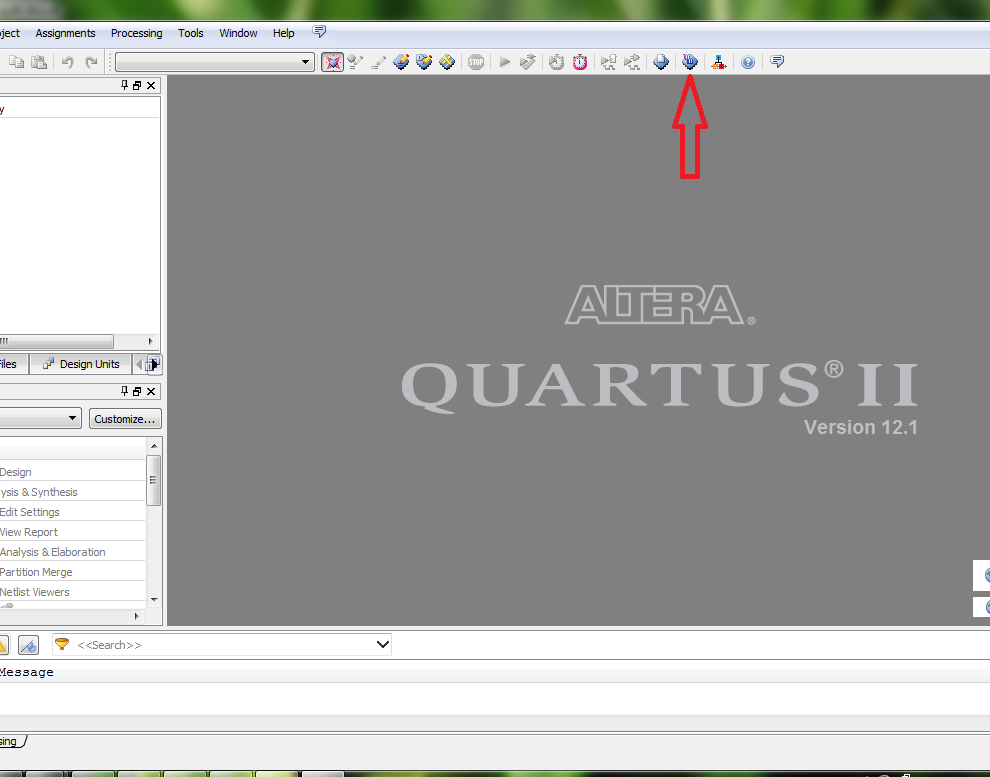
6, Click the iron as below .
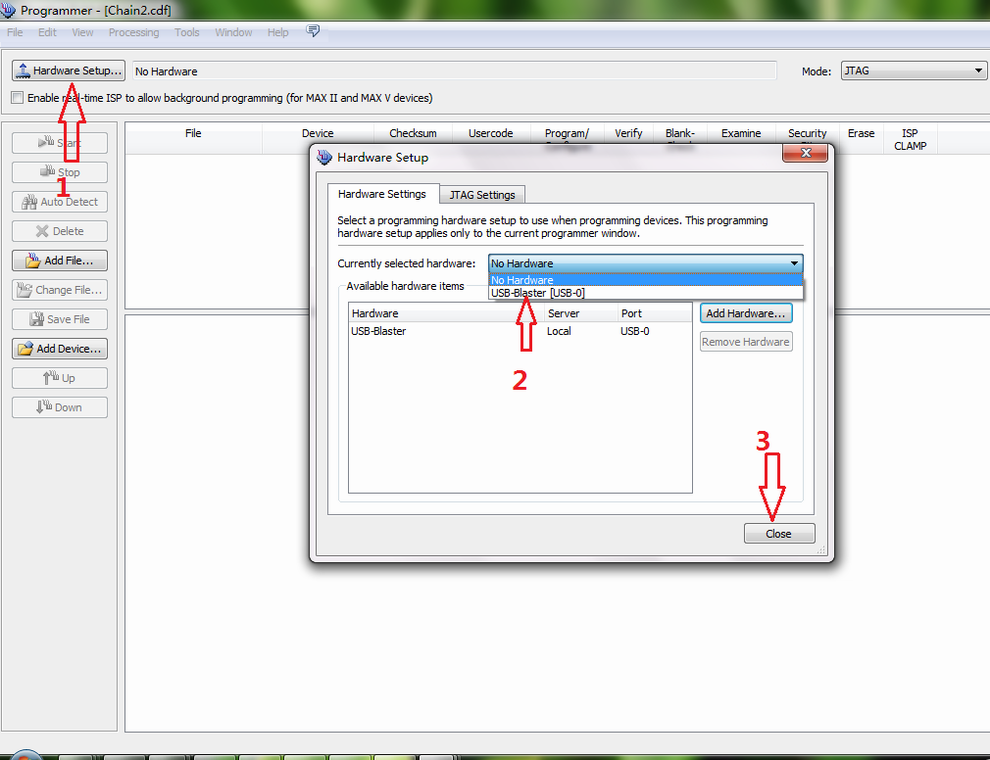
7, Follow the steps select as below . (If there is no USB
-Blaster device show here,close the Hardware Setup window,
pull off the USB cable from computer, then push into again, and
operate go to step 6 again.
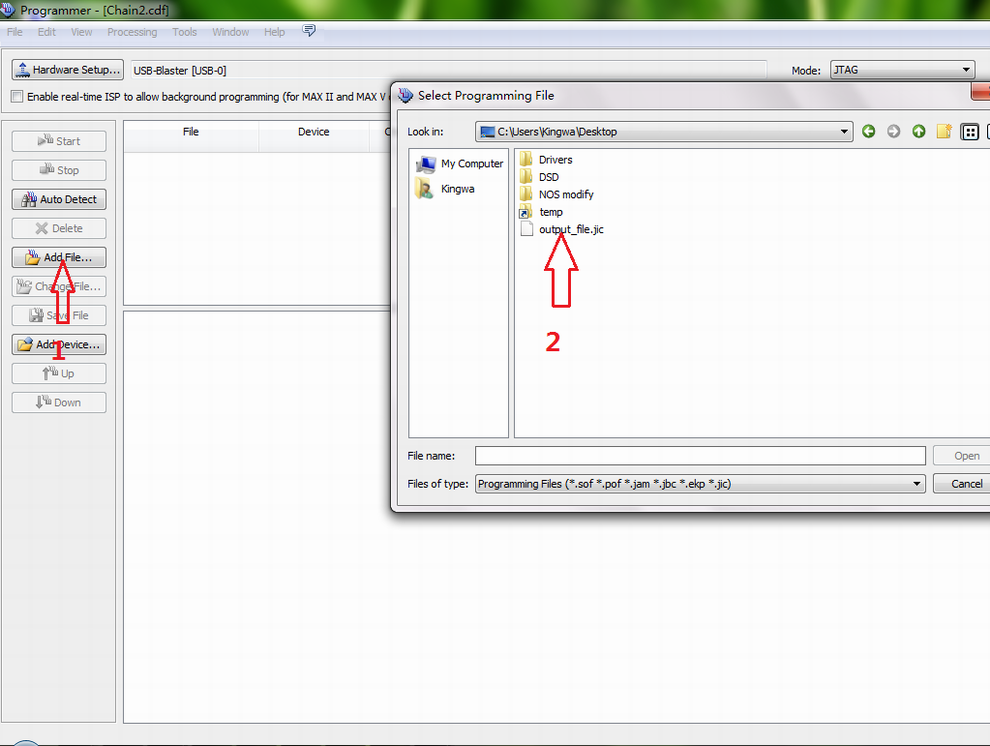
8, Follow the steps select .jic update firmware file as below .(Please
note the firmware name may different to the picture .)
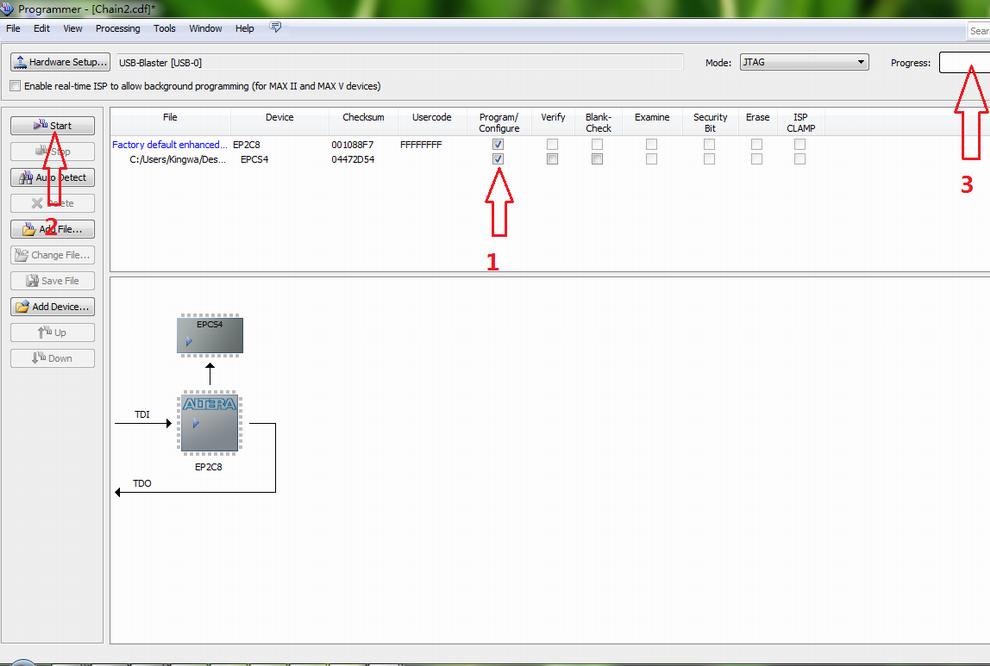
9, Follow the steps select as below , you can see the two chip
diagrams in the bottom window, the chips should show their model
name , like "EPCS4 and EP2C8 or EP4C10 " . (If the chips' name
unshow , it most like the blaster output wires has bad connect, you
had to power off the DAC, pull and push the blaster output wires ,
then power on the DAC)
Click “Start “ and waiting one minute while the
“Program” show “Succeed” . (If click the “Start “ but show error
message, pull off the USB cable of the blaster from the computer,
and push into again. If still can not work, go to step 6 check if
the USB-Blaster device if still exist.)
10, Power off the DAC, pull off the USB Blaster
from the DAC, then pull off the connect from the computer.
The
update is finished.
If the update cause the sound with noise or distortion,
connect the blaster and update again. |